Happy Thanksgiving.
I have a new passion to share along with my love of Heartfelt and that is Art Impressions water colour stamps. Check out www.artimpressions.com They have a nice selection of rubber stamps that you use to create mini scenes. You colour the stamps with a water based marker, stamp on water colour paper and then use a barely damp brush to blend the colour in a dabbing motion. Bonnie the owner of Art Impressions has a lot of great videos on this technique. I have signed up on face book and via email to get information on their next video which is generally on water color Wednesday.
Here is the video for my inspiration.
If you are like me you are so looking forward to spring. The sunrise Lilly collection by Heartfelt Creations is sure to chase away the winter blues. I taught this class today at Crop A While, using the card kit by Heartfelt Creations. There is lots of shimmer and shine added using glitter and Wink of Stella. Then I used Glossy accent glue as a varnish on top to give even more shine. I used Tim Holtz distress ink to colour the lilies. Gold Prills were added to the stamen centres for added dimension and detail.
Here is my newest Heartfelt Creations card using the Sugar Hollow collection. It is a 5x7" card and I have turned it horizontal so that the flap looks like the roof of the owl house.All the flowers are made using the Birds and Bloom set by Heartfelt Creations.
The flowers are coloured using Tim Holtz distress ink. Pale pink Prills were used in the flower centres to add dimension.
An Easel card is a fun fancy fold card. Cut cardstock 4 1/4" X 8 1/2" and score at 2 1/8" and again at 4 1/4" on the 8 1/2" side, To make the easel card base.
I then attached a panel of 4 1/4" X 4 1/4" and layered a paper panel from the Sugar Hollow paper pad by Heartfelt Creations.
Take a look at the close up of the front of the card for all the flower details that I added.
The flowers are made from the Birds and Blooms set as well as Ariana Blooms for the larger flower.
Here is my latest card. It uses the Heartfelt Sugar Hollow collection.
Supplies from Heartfelt Creations:
Sugar Hollow Hangout die and cling stamp set
Sugar Hollow Bungalow die and cling stamp set
Birds and Blooms cling stamp set and the Leafy Branch die.
Sugar Hollow paper collection, and the Deluxe Flower Shaping kit.
Other supplies used: glue stamp pad, Prills Heart of gold, distress ink in peeled paint, spun sugar, vintage photo and picked raspberry, vintage photo distress marker, crystal glitter, clear sealer, pop dots, Momento ink in Espresso Truffle and Tuxedo black, white cardstock, and Dries clear Art Glitter glue.
Cut card stock to 8.5 X 5.5" and fold in half so you have a card that is 4.25 X 5.5. Sponge vintage photo around edge of card base. Cut a piece of designer paper to 4 X 5.25" and layer onto card base.
Stamp bird cage onto white cardstock with the glue stamp pad and sprinkle glitter. Then seal with clear sealer and die cut. Add to card with pop dots.
Stamp tree with espresso truffle ink, die cut and colour. Cut off tree base, shape with the Deluxe shaping kit and layer around the bird cage as shown. Stamp, die cut, colour and shape the flowers and a few extra leaves from the Birds and Blooms set as well as the owl. Add to card as shown. Add Prills to flower centre and pop dots to attach the owl.
Cut verse from paper collection and add to card.
Heartfelt has a great video on the star Hollow collection.
Today, at Crop A While I taught the All Glammed Up class using the Heartfelt Creation's kits. I love the kits as everything is all die cut and ready to go. All I have to do is teach the techniques. It saves me days of cutting and packaging everything up.
There is lots of glitter, bling and sparkle added to the cards that just does not show up in the photo.
I made this LOVE banner a few years ago but it is perfect to share for Valentine's Day.
I made the paper. Yes, it is handmade paper using Arnold Grummer's paper making technique with a blender. Then you pour the pulp into a heart mold.
I cut the letters using an alphabet die and glues on with dries clear glue.
I often need quick and easy Thank you cards. If I was more organized I would have made extra ones to have on hand. A lot of the fun is creating cards for the recipient at the time I need them though.
Heartfelt Creations supply list:
Large Elegant word background
Arianna Blooms cling stamp set and die
Arianna lace die
Dries clear glue
Other products used:
Shimmer cardstock
White card stock
Clear Wink of Stella
Foam dots
Pearl bead
Momento espresso truffle ink
Faded jeans distress ink
Daubers
Cut white cardstock to 4 1/4". X 11" and fold in half so you have a card that is 4 1/4" X 5 1/2".
Cut the shimmer cardstock to 4 x 5 1/4" and stamp with the word stamp using the espresso truffle ink. With a daubers sponge around the shimmer cardstock. Then layer onto card front with foam dots to give dimension.
Die cut the flowers and paper lace pieces. Colour the flower with the distress faded jeans ink and shape as desired. Layer all the flower pieces together and attach to the card. Add a little something, something with the Wink of Stella onto the blue flower. This gives a beautiful shimmer to the flower petals. Add the pearl to centre of the flower. Easy! Sign and Mail the card.
The second project that I am submitting for the Heartfelt designer call is this tri-shutter style card.
I used the following Heartfelt Creations items:
Classic sunflower die and stamp set
Classic sunflower paper collection
Sunflower stem cling stamp set
The Botanical wings die
Botanical rose stamp set ( for the leaves)
Cut mat create 1A
Dries clear glue
And Redland elements for the flower centres
Other items used:
Seam binding ribbon from my stash
Distress inks in scattered straw, wild honey, peeled paint and vintage photo
Green cardstock for card base
Cream cardstock pieces
Die cut machine
Score pal
Paper cutter
Cut cardstock to 5 1/2" X 12". On horizontal side score at 2,4,8 and 10". Turn cardstock 1/4 turn and 1 1/2" from edge cut between score marks 2" to 10" and repeat on other long side.
Follow the video on split coast stampers on how to make the tri-shutter card.
Decorate the card base with the Classic sunflower paper collection as shown. Cutting the paper 1/8" less than the card. Stamp and die cut the sunflowers then colour with scattered straw and wild honey ink then shape as desired. Stamp, cut and colour the leaves from the Botanical set.n shape leaves as desired. Die cut the swivel from the Cut mat Create die and lightly sponge with vintage photo ink, then cut in half. Glue flowers, leaves, swivels and ribbon onto card front as shown. Stamp verse from Sunflower stems cling stamp onto cream cardstock cut to fit rectangle on green cardstock.
Follow the Heartfelt Creations video on how to shape the sunflower.
This is one of the 3 projects that I am submitting to Heartfelt Creations designer call. I have been wanting to make a wreath for some time so the designer call was the perfect opportunity.
My friend Deanna's birthday is coming up on Tuesday so I made her a card.
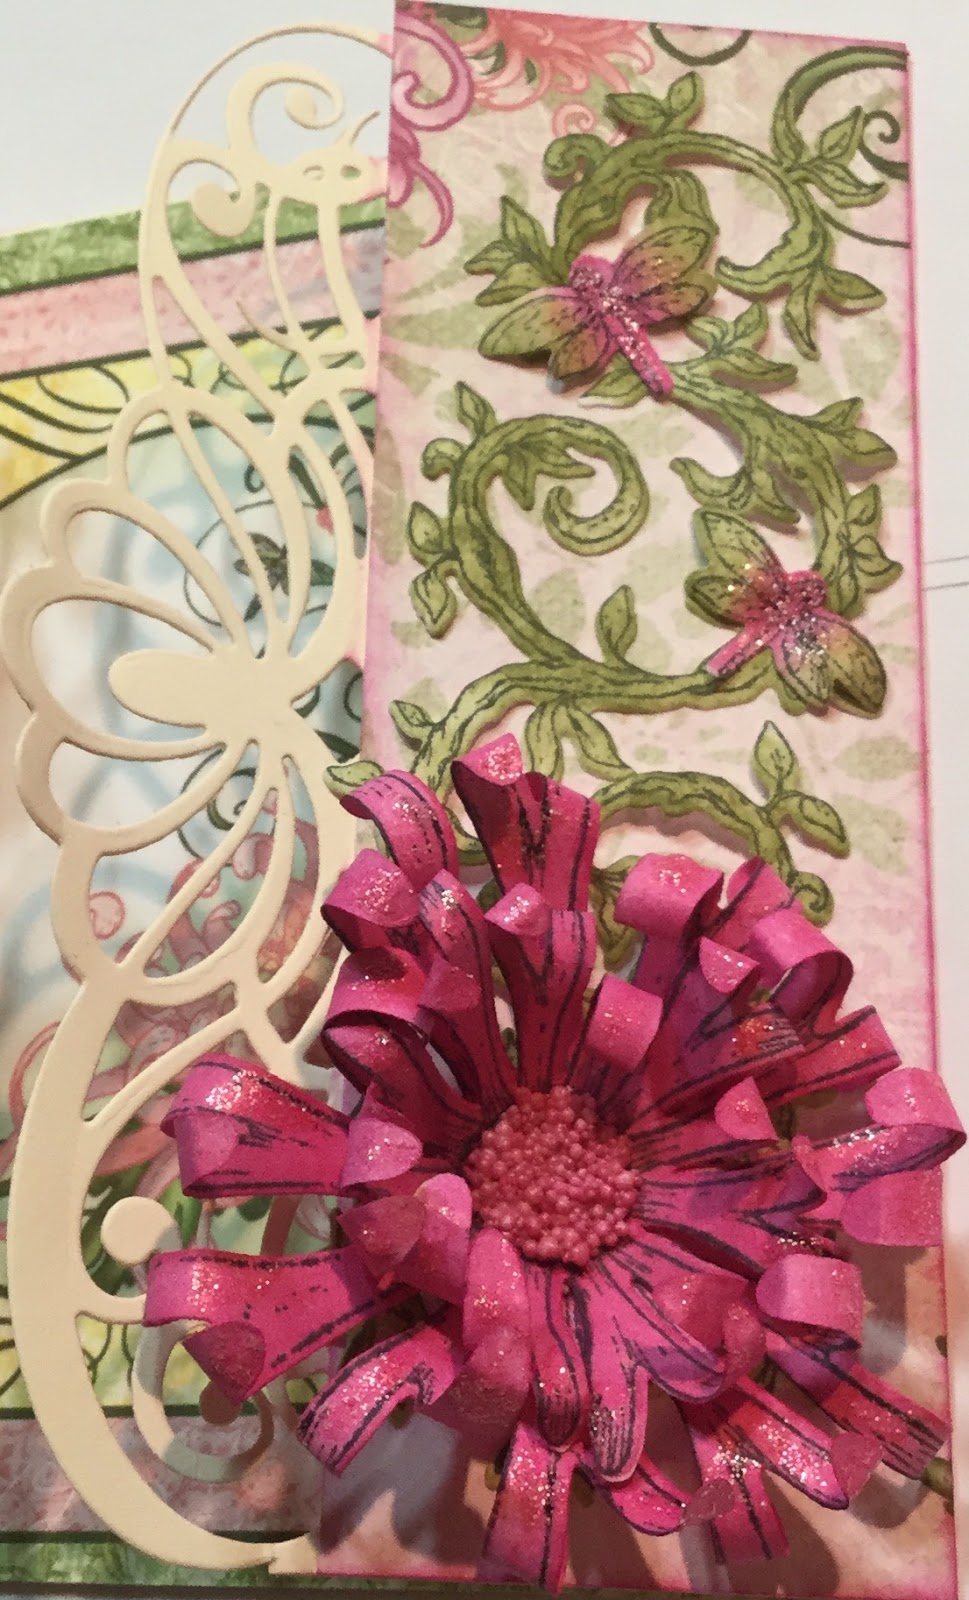
I used Heartfelt Creations Enchanted Mum stamp set and die, Enchanted Mum paper pad as well as the Enchanted dragonflies stamp set and die. Plus the Regal boarders and Pockets die. Can you tell I am a big Heartfelt Creations fan.
Other products used is distress ink and stickles glitter glue.
The card measures 6"x6" and the flaps on the front are 2". The pretty art nouveau style flap is Heartfelt's Regal boarders die and is attached on both sides on the front of the 2" flap and then the beautiful paper covers this.
inside of the card.
There is a wonderful Heartfelt Creations video on how to shape the mums
For awhile I was a Julie Nutting doll freak. The dolls are by Prima Marketing. I have an extensive Pinterest folder of doll cards and ideas.
I created this doll closet for a class I taught at Crop A While in Orleans, Ontario. It uses a Tim Holtz configuration box as the closet base. I then decorated it with a variety of designer papers and accessories.
The clothes are stamped from the dolls and cut out. It was a lot of fun creating the wardrobe.